TattoosAI
You're probably there already, staring at a folder full of screenshots, a half-finished mood board, and one arm that's about to become a long-term project. The hard part isn't finding tattoo ideas, it's turning random images you like into a sleeve that still makes sense when your arm bends, rotates, and heals in stages.
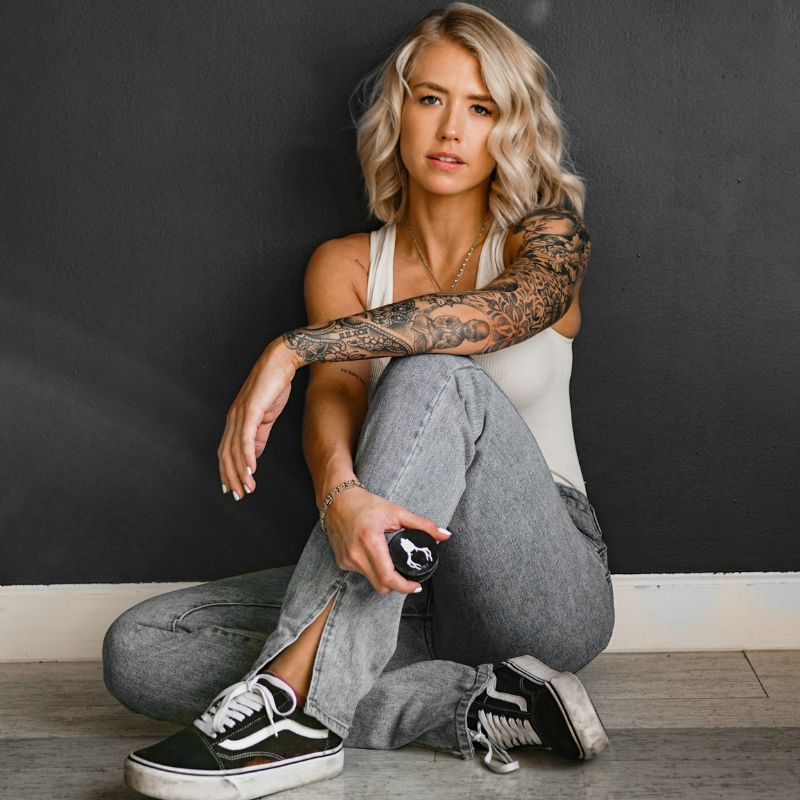
A good sleeve isn't a collage. It's a composition system built around anatomy, hierarchy, and negative space, with the whole thing planned before the first line is tattooed. That's why strong sleeves feel inevitable from the shoulder cap down to the wrist, while weak ones can look busy on day one and messy a year later.
Table of Contents
- Why Most Sleeve Ideas Fail Before the First Session
- Defining Your Theme and Choosing Motifs That Work Together
- Mapping Composition and Flow to Your Arm Anatomy
- Creating Reference Sheets and Mockups with AI Tools
- Planning Sessions and Budgeting for a Long-Term Project
- Preparing a Clear Brief for Your Tattoo Artist
- Aftercare and Maintaining Your Sleeve Over Time
Why Most Sleeve Ideas Fail Before the First Session
A sleeve usually falls apart before ink ever touches skin. The common scene is familiar, someone brings in a dragon, a rose, a skull, a geometric band, and a few “maybe filler” screenshots, then asks the artist to make the arm feel unified. That approach tends to produce something crowded, disconnected, and overworked, because the images were chosen one by one instead of as parts of a single system that has to live on a moving arm.
Practical rule: if a motif only works as a standalone wallpaper image, it still may fail as sleeve material.
Patchwork thinking breaks the arm
Patchwork sleeves are not automatically bad. They work when there is intentional spacing, repeatable visual language, and a clear relationship between each piece and the next. Without that, the eye gets no rhythm, no hierarchy, and no obvious route through the design. The result is a set of strong tattoos that never quite connect.
Good planning starts with structure, then fills that structure with motifs that belong there. Planning guides stress mapping focal points, connectors, and negative space before the first session, and they also make the practical point that a sleeve often needs 40+ hours across 4 to 10+ sessions, with 2 to 3 weeks of healing between sessions, rather than one long appointment planning guide. That pace is slower than many first-time clients expect, but it is often what keeps the work readable and gives the skin time to recover.
The first decision is hierarchy, not decoration
A sleeve reads better when one or two elements carry most of the visual weight and everything else supports them. One industry guide says artists commonly divide the arm into four main sections and keep sleeves to four to five main subject matters so the composition stays legible from different angles design guide. That matters because the arm is a moving cylinder, not a flat poster, and a design that looks fine on a screen can feel chaotic once it wraps around the bicep, elbow, and forearm.
Artists also look at how the work will survive long-term wear. Dense black areas, fine detail, and tight packing all age differently, so a sleeve built from too many unrelated images can turn muddy faster than one with clear spacing and strong hierarchy. I have seen clients bring in reference sets that looked impressive on a mood board, then collapse once the artist tried to place them around actual anatomy.
If you start with isolated images, you usually end up forcing the artist to fill awkward gaps instead of designing them on purpose. If you start with hierarchy, the arm can breathe. That is the difference between a sleeve that feels designed and one that feels assembled. A clear system also makes the later sessions easier to sequence, which matters just as much as the first concept.
Defining Your Theme and Choosing Motifs That Work Together
A sleeve gets easier once the theme is specific enough to guide real decisions. “Nature” is broad. A storm-tossed ocean with a lone koi, broken reeds, and water movement that wraps the forearm gives an artist something concrete to build. The theme does not have to be literal or tell a full story, but it does need enough clarity to decide what belongs, what supports it, and what gets left out.

Use motifs that reinforce one visual language
Good sleeves usually keep the visual language tight. Japanese traditional, neo-traditional, blackwork geometric, and watercolor abstract can each work on a sleeve, but mixing all four in one arm usually weakens the result unless a skilled artist is intentionally blending them. Question is not whether you like a motif, it is whether it belongs in the same visual world as the rest of the arm.
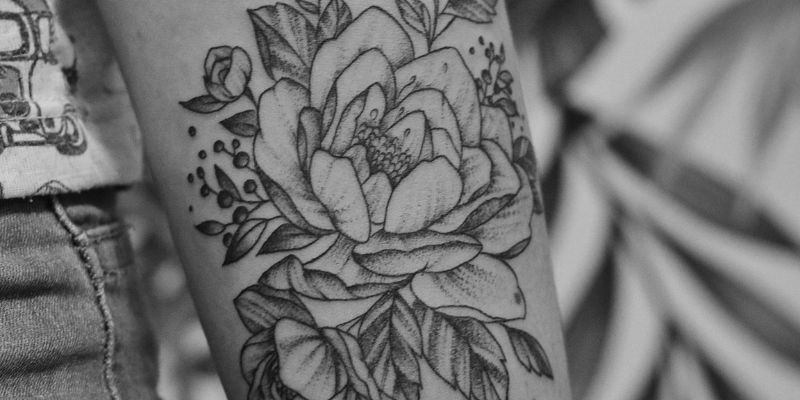
Scale is the next filter. Big focal pieces need enough surface to breathe, while smaller motifs should work as transitions instead of competing headlines. A sleeve that keeps to a few subject matters stays readable, while a sleeve that tries to hold every reference at once starts to feel like a scrapbook. For a useful reference on how artists think about flow and motif placement, a tattoo flow layout guide can help you see how shape and movement influence the final composition.
The arm also has to be planned for motion, not just still images. What looks balanced on a flat mockup can become crowded once the elbow bends or the forearm rotates, so every motif should earn its place in more than one position.
Anchor pieces do the heavy lifting
The strongest sleeves usually have one anchor element that takes up the most visual weight, with the rest of the design distributed around it through supporting imagery and negative space. That anchor might be a portrait, creature, flower cluster, mask, or symbolic emblem, but it needs room to dominate.
Here is the practical test I use. If I remove one motif and the sleeve still feels complete, that motif was probably supporting. If the whole concept falls apart, that motif was doing anchor work. That distinction keeps people from cramming every sentimental reference onto one arm, which is where a lot of early sleeve plans start to break down in the studio.
The same logic shows up in other body-focused ornament work too. A project like henna tattoo for Swiss spas shows how decorative elements have to follow the shape and movement of the hand if they are going to read cleanly instead of feeling pasted on.
Mapping Composition and Flow to Your Arm Anatomy
A sleeve starts to make sense the moment you stop treating the arm like a flat gallery wall. The surface wraps, twists, and changes shape from shoulder to wrist, so the composition has to work with that movement instead of fighting it.

Mark the arm before you draw the art
Start with photos from multiple angles, then mark the outer bicep, forearm, elbow ditch, inner arm, wrist bones, and shoulder cap. That map shows you where a motif can sit cleanly, where it needs breathing room, and where the arm changes shape too sharply for fine detail. A good anatomical mapping guide keeps the design tied to the limb's wrap and muscle groups instead of stacking unrelated images on top of the body.
The arm has front, side, and back views, and a good sleeve has to read cleanly from all three.
The shoulder cap or outer bicep usually carries the strongest visual weight because that area can hold a bold form without fighting the elbow's movement. The elbow is a common trouble spot, since hard edges across a flex point can make the tattoo split visually when the arm bends. Give that area a transition role, or let it bridge two larger elements instead of making it the star.
Plan for motion, not still images
A sleeve has to hold together when the arm is relaxed, bent, and rotated. Long straight borders, rigid symmetry, and abrupt cutoffs can work, but only if they are placed with the joint movement in mind. Curves, overlap, and controlled negative space usually do more work here, because they let the eye move across the arm without hitting a dead stop.
Coverage choice changes the whole read of the sleeve. Planning notes often describe balanced sleeves with about 60% tattooed surface and 40% visible skin, while denser full-coverage approaches can push toward 85% to 90% tattooed surface. Those figures are not decoration trivia, they affect how much contrast you need, how much room the motifs have to breathe, and how easy the sleeve is to keep legible as it heals. A packed arm can look powerful, but it leaves less margin for error if the spacing gets tight or the contrast falls flat.
The cleanest way to judge that balance is to sketch the arm as it moves, then compare how the main forms behave in each position. A useful visual companion is this sleeve flow guide, which helps separate dominant shapes from connective work before the design gets locked in.
Creating Reference Sheets and Mockups with AI Tools
Once the theme and anatomy map are set, reference gathering gets a lot more productive. Instead of saving every tattoo that catches your eye, build a sheet that separates anchor ideas, supporting motifs, texture references, and placement-specific notes. That gives your artist something that behaves like a design brief instead of a chaotic inspiration dump.

Prompt for structure, not just subject matter
A vague prompt like “koi sleeve” leaves too much open. A better prompt names the subject, style, texture, and mood, such as a watercolor koi with flowing water elements and cherry blossom accents in Japanese traditional style. That kind of prompt gives you multiple directions fast, which is useful when you're still deciding whether the sleeve should lean bold, ornate, minimal, or organic.
TattoosAI can generate sleeve concepts from text prompts and style selections, which makes it useful for exploring variations before you sit down with a tattooist. You can test different directions, build a folder of options, and use the strongest results as visual shorthand rather than final artwork. The tool's placement simulator is still in development, so the most reliable use case right now is concept generation and brief building through the app.
Turn outputs into a usable reference sheet
The trick is organization. Put the strongest AI concepts beside photos of real arm anatomy, then label which images are about flow, which are about style, and which are about density or contrast. That keeps the sheet honest, because a beautiful image that doesn't work on an elbow still isn't usable.
A practical reference sheet usually includes:
- Theme direction: one sentence that describes the sleeve's core idea.
- Focal references: the strongest motifs that deserve the most space.
- Transition references: clouds, smoke, leaves, stipple, or pattern work that links sections.
- Placement notes: outer arm, inner arm, elbow area, wrist finish, and shoulder cap.
Used that way, AI becomes a communication tool, not a substitute for the artist's composition work. It shortens the translation gap between what's in your head and what can be built on skin.
Planning Sessions and Budgeting for a Long-Term Project
A sleeve does not move from sketch to finish in one clean run, because skin needs recovery time and the design usually gets sharper between sessions. Rushing the schedule can blur linework, make shading harder to match, and leave no room to adjust the composition once more of the arm is healed. Long-form sleeve planning advice also puts the project in the range of 5 to 10 sessions of 3 to 5 hours each, with costs that can land around $3,000 to $15,000 depending on style, artist tier, and city sleeve planning guide.
Build the sleeve in stages
A sane sequence starts with consultation and planning, then moves into a foundation session, healing breaks, fill sessions, and final touch-ups. That pacing keeps the sleeve from feeling forced and gives the artist room to refine the shape of the whole arm as each section settles into skin.
Budget reality: the first session rarely tells you the final cost cleanly, because sleeve complexity reveals itself as the arm fills in.
Healing drives the timing as much as budget does. Professional planning advice often recommends 2 to 3 weeks between sessions, while other sleeve-planning guidance uses healing windows of about 3 to 6 weeks depending on the amount of work and how your skin responds sleeve planning guide. If those gaps get compressed, the skin stays irritated, healing slows, and the artist loses the clean surface needed for strong lines and even shading.
Sequence the visual weight early
Put the largest focal pieces in first, while the supporting elements stay flexible. That approach keeps you from locking the sleeve into a layout that looked good on paper but leaves no room for balance once the first major forms are healed. It also helps when real life interrupts the process, which happens often on a project that stretches over months.
| Planning Factor | Typical Range | Notes |
|---|---|---|
| Session count | 4 to 10+ sessions | Full sleeves are built in phases, not one sitting sleeve planning guide. |
| Session length | 3 to 5 hours each | Longer blocks are common for large-scale work sleeve planning guide. |
| Healing gap | 2 to 3 weeks | Some planning guides allow 3 to 6 weeks between stages sleeve planning guide. |
| Total cost | $3,000 to $15,000 | Depends on style, artist tier, and city sleeve planning guide. |
Preparing a Clear Brief for Your Tattoo Artist
A good brief respects the artist's skill without handing them a pile of contradictions. The point is to show them the theme, the placement logic, the main references, and the few decisions that matter most, while leaving room for composition choices they're better at making than you are. A strong sleeve brief usually leads to a better consultation because the conversation starts with structure, not guesswork.

Give the artist the right inputs
The most useful brief includes five things. First, a defined theme. Second, reference sheets with your strongest concepts. Third, a placement map showing where anchor pieces and transitions should land. Fourth, a color direction or black-and-grey preference. Fifth, style examples that show the level of detail you want, not just the subject matter.
- Defined Theme: a short sentence that makes the sleeve's purpose clear.
- Reference Sheets: a curated set of images, not an endless folder.
- Placement Map: where the shoulder, forearm, elbow, and wrist should carry weight.
- Color Palette: the overall range, especially if you want color restraint.
- Style Examples: tattoos that show line weight, contrast, and density.
A consultation should also reveal whether the artist designs sleeves, or just makes strong single pieces. Look for healed photos and completed sleeves in their portfolio, because a sleeve artist has to manage flow across joints, not only draw attractive individual images. That distinction matters a lot more than social media likes.
Leave the right things open
Don't micromanage every connector, leaf, wave, or smoke trail. A good tattooist needs space to adapt the design to your skin, especially around the elbow ditch, inner arm, and any existing tattoos you're trying to integrate. If you over-specify every detail, you often get a stiffer sleeve and a worse fit.
Bring the idea in with conviction, then let the artist solve the composition problem.
That's the simplest way to protect both the vision and the final result. A clear brief doesn't box the artist in, it reduces wasted consultation time and keeps the sleeve from drifting away from the original plan.
Aftercare and Maintaining Your Sleeve Over Time
Aftercare starts the moment you leave the chair, and it keeps mattering long after the tattoo is healed. Fresh work needs cleanliness, minimal friction, and patience during the healing windows between sessions, because that's when line quality and color settle into their final state. The same discipline also protects the sleeve years later, when sun and dryness become the main threats.
Heal each session like it matters
Follow the routine your artist gives you, keep the area clean, and avoid anything that rubs or traps sweat against the skin. During the healing phase, the goal is to protect the work you just paid for, not to test how quickly it can return to normal life. That means loose clothing, no picking, and no unnecessary exposure until the skin has fully settled.
If you want a simple skin-care framework for the rest of your body and tattoo-adjacent maintenance, the ArtNaturals skincare routine guide is a practical place to look for general moisturizing and routine-building ideas that support healthy skin habits.
Maintain the sleeve for the long haul
Once the sleeve is healed, sun protection becomes essential. UV exposure softens contrast over time, and sleeves get more exposure than tattoos on covered areas. Regular moisturizing also helps skin stay supple, which supports how the tattoo looks as your body changes over time.
The best long-term sleeves are the ones that were planned with restraint. Good negative space, balanced density, and clean anatomical flow age better than overcrowded layouts because the eye still has room to read the composition. If you're planning touch-ups later, ask your artist which parts of your design are most likely to need them based on style and placement.
A simple final check helps:
- Theme clarity: the sleeve has one visual idea, not six.
- Anatomical flow: the design wraps the arm naturally.
- Session logic: focal pieces were done before filler pressure took over.
- Healing discipline: you protected the skin between stages.
- Long-term care: you keep up with moisture and sun protection.
If you want help turning your sleeve idea into something you can take to a studio, TattoosAI can generate custom tattoo concepts from your prompts and style choices so you can compare directions before you commit. It's a practical way to build reference sheets, tighten your brief, and walk into the consultation with a clearer composition plan. Visit TattoosAI and start shaping a sleeve that fits your arm instead of fighting it.